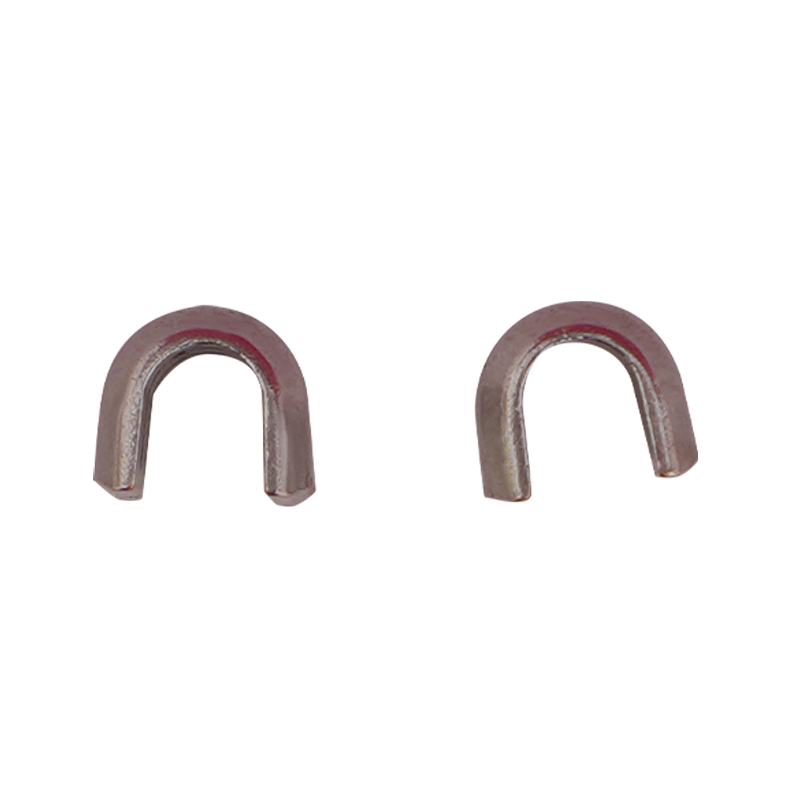
1. What are zipper top and bottom stoppers and why proper installation matters
Zipper top and bottom stoppers are small metal or plastic components that limit slider travel and secure the zipper chain ends. The bottom stopper prevents the slider from separating the two halves of the zipper; the top stopper prevents the slider from running off the top and protects the teeth and tape. Correct installation ensures smooth function, prevents premature failure, and improves aesthetic finish—critical for garments, bags, tents, and industrial applications.
2. Tools and materials required
Gathering the right tools and materials before beginning reduces rework and damage to the zipper tape or teeth. The exact selection depends on whether stoppers are metal crimp types, plastic injection-molded, or sewn/ stitched varieties.
- Top and bottom stoppers (matching the zipper type — metal or nylon/plastic).
- Flat-nose pliers and round-nose pliers (small, precise jaws).
- Side cutters or micro-snips for trimming excess teeth or threads.
- Needle and strong thread or industrial sewing machine for sewn stoppers.
- Optional: small anvil or bench block to protect the work surface, tweezers, and a ruler or caliper for precise positioning.
3. Preparation: inspect and mark the zipper
Before attaching any stopper, inspect the zipper tape and teeth for damage. Ensure the slider matches the tooth pitch and that the tape is not frayed where the stopper will be placed. Use a ruler or caliper to measure the exact stopper positions: bottom stopper is typically placed flush with the end of the teeth (or 1–2 mm beyond for metal stoppers), while top stoppers are positioned to allow the slider to sit fully closed without stressing the tape.
3.1 Marking conventions
- Bottom stopper: mark the last engaged tooth on both tapes.
- Top stopper(s): mark the point where the slider should stop when the zipper is fully closed (consider overlap for garments or top tape fold).
4. Installing the bottom stopper (step-by-step)
The bottom stopper secures the zipper halves and is critical for separation-type zippers and jacket closures. Below are common methods for metal and plastic zippers.
4.1 Metal crimp bottom stopper
- Slide the crimp-style stopper onto both tapes until it sits on the marked position covering the last tooth(s).
- Using flat-nose pliers, squeeze the stopper legs evenly until they deform and clamp the tape securely. Avoid over-crushing which can cut the tape fibers.
- Test by attempting to pass the slider over the stopper; it should stop cleanly and the halves should not separate under normal pull.
4.2 Plastic injection-molded bottom stopper
- Push the molded stopper onto the tape end — many have a tapered entry and snap into place.
- If the stopper is a tight fit, use round-nose pliers to press it evenly until seated. Verify alignment on both tapes.
5. Installing the top stopper (step-by-step)
Top stoppers must allow the slider to close fully without damaging teeth or tape. Position and method depend on whether the zipper needs single or double stoppers (two stoppers set close together) for added security.
5.1 Single metal top stopper
- Place the stopper over the tape at the marked top stop location, ensuring it does not pinch the last engaged tooth.
- Crimp carefully with flat-nose pliers until the stopper’s legs clamp the tape. Slight rotation of the pliers while squeezing can produce a more secure, even crimp.
- Operate the slider to ensure a smooth stop and that the tape is not distorted.
5.2 Sewing or stitched top stopper (textile-heavy applications)
- Fold the tape back slightly and apply multiple bar-tacks (6–10 stitches) across the tape directly above the last tooth to form a durable fabric stop.
- Use heavy-duty thread and, if possible, a zigzag stitch on an industrial sewing machine for extra reinforcement.
6. Comparing stopper types and selection guide
Different applications and zipper materials require different stopper choices. The table below summarizes pros and cons to help selection.
| Stopper type | Best for | Advantages |
| Metal crimp | Heavy-duty zippers, outerwear | Strong clamping, durable |
| Plastic molded | Nylon coil and molded tooth zippers | Lightweight, corrosion-resistant |
| Sewn bar-tack | Bags, tents, sewn-in finishes | No hardware, flexible, low-cost |
7. Common mistakes and troubleshooting
Mistakes during installation can lead to malfunction. Typical problems include over-crimping that severs tape fibers, placing stoppers too close to teeth which jams the slider, or using mismatched stopper types that do not grip the tape. To troubleshoot: remove the stopper carefully with pliers or snips, inspect the tape, realign the mark, and reinstall using a less forceful crimp or a different stopper type.
8. Final inspection and quality checks
After installation always perform a functional check: run the slider across the stopper in both directions, apply a pull to the closed zipper to confirm the stopper resists separation, and visually inspect for tape damage or uneven crimps. For production runs, document required N-level pull test forces and failure criteria to ensure repeatable quality.
9. Conclusion: best practices summary
Accurate marking, using the correct stopper for the zipper type, and careful, even crimping or sewing are the keys to reliable zipper top and bottom stopper installation. Follow the step-by-step procedures above, perform functional testing, and maintain consistent quality checks to ensure long-lasting zipper performance across consumer and industrial products.


 en
en  русский
 한국어
한국어 get a free quote


