 en
en  русский
 한국어
한국어 get a free quote

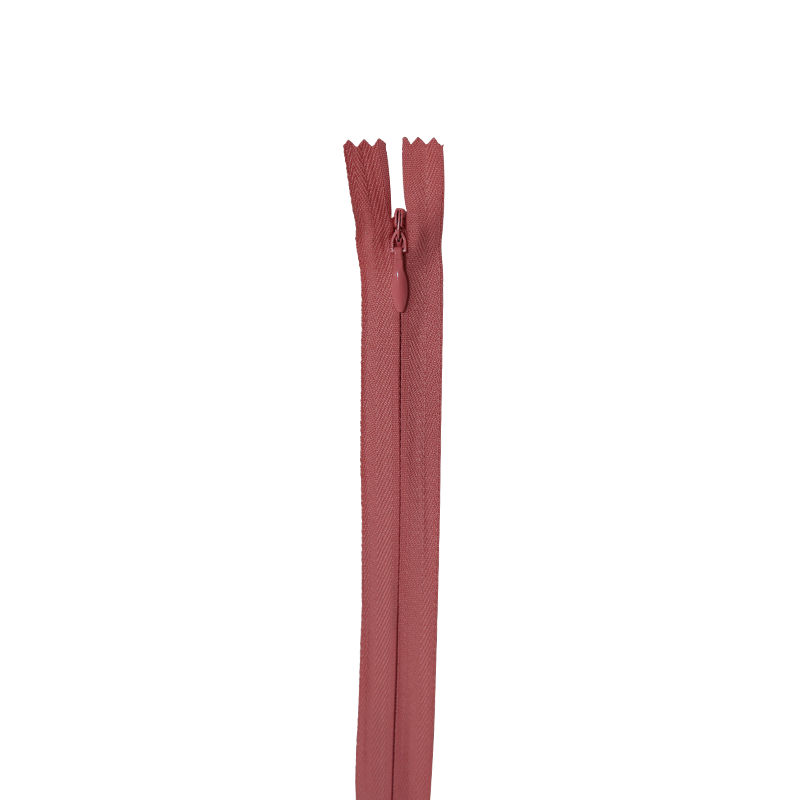
An invisible zipper is a specialized concealed fastener where the coil is rolled to the underside of the tape, making the closed zipper virtually disappear into a seam. It produces a clean, uninterrupted seam line that is indistinguishable from a plain sewn seam when properly installed — which is why it has been the standard closure on tailored dresses, skirts, and eveningwear for decades.
This guide covers everything practical about invisible zippers: how they differ from regular zippers, how to choose the right one, how to sew them correctly, the most common installation mistakes, and how to care for garments that use them.
Content
- 1 How an Invisible Zipper Differs from a Regular Zipper
- 2 Choosing the Right Invisible Zipper
- 3 Tools You Need for a Clean Installation
- 4 How to Sew an Invisible Zipper: Step-by-Step
- 5 Common Invisible Zipper Problems and How to Fix Them
- 6 Invisible Zippers on Different Fabric Types
- 7 Invisible Zippers in Lined Garments
- 8 Caring for Garments with Invisible Zippers
- 9 When to Replace an Invisible Zipper
How an Invisible Zipper Differs from a Regular Zipper
Understanding the structural difference between an invisible zipper and a conventional zipper explains both why it looks the way it does and why it requires a different installation technique.
On a standard coil or tooth zipper, the coil sits on top of the tape and faces outward — visible when the zipper is installed in a seam unless covered by a placket or flap. On an invisible zipper, the coil is curled backward toward the wrong side of the tape, so when the zipper is closed, the coil hides behind the tape and only the pull tab is visible at the bottom of the seam.
This coil orientation also means the zipper must be sewn while it is open and the coil is uncurled — the opposite of how regular zippers are installed. Attempting to sew an invisible zipper closed, as you would a regular zipper, results in a visible ridge and a seam that does not lie flat.
| Feature | Invisible Zipper | Regular Lapped Zipper | Centered Zipper |
|---|---|---|---|
| Visibility when closed | None (seam only) | Minimal (one side shows) | Visible coil between seam edges |
| Sewn open or closed | Open (coil uncurled) | Closed | Closed |
| Special foot required | Yes (invisible zipper foot) | Zipper foot | Zipper foot |
| Best applications | Dresses, skirts, formal wear | Trousers, skirts, bags | Cushions, bags, sportswear |
| Seam allowance needed | 1.5 cm (⅝ in) minimum | 1.5 cm (⅝ in) | 1.5 cm (⅝ in) |
Choosing the Right Invisible Zipper
Not all invisible zippers are identical. Getting the specification right before you start saves the frustration of replacing a zipper that is the wrong length, weight, or color after the garment is already cut.
Length
Invisible zippers are sold by their total tape length, not their usable length. The actual opening (the sewable portion between the top stop and the bottom stop) is typically 2–3 cm shorter than the stated tape length. For a dress back seam where you need 55 cm of opening, choose a 60 cm zipper. Standard lengths run from 20 cm to 70 cm in most brands, with 22 cm and 56 cm being the most commonly stocked sizes for garment work.
Always cut the zipper to length from the bottom, never from the top — cutting from the top removes the top stop and destroys the zipper. If the zipper is too long, the excess tape simply extends below the bottom of the seam opening and is enclosed in the seam allowance.
Weight and Coil Size
Invisible zippers are classified by coil size, most commonly size 3 (fine) and size 5 (medium). Size 3 is the standard for most dress and skirt applications — lightweight fabrics, lining materials, and structured garment fabrics. Size 5 handles heavier materials like denim, canvas, or thick suiting where a size 3 coil would be overwhelmed by the fabric bulk.
Color Matching
The zipper tape should match the garment fabric as closely as possible, because a small portion of the tape is visible at the bottom of the closed seam near the pull. Major brands such as YKK, Coats, and Prym each offer over 100 standard tape colors. When an exact match is unavailable, choose a shade slightly darker than the fabric — darker tape recedes visually while lighter tape draws attention.
Brand Quality Differences
Quality varies significantly among invisible zipper brands. YKK invisible zippers are the industry standard used by most professional dressmakers and apparel manufacturers; their coil tension is consistent and the tape lies flat without distortion. Economy invisible zippers from unbranded suppliers frequently have uneven coil tension that causes the tape to bow and creates visible puckering in the finished seam even when installed correctly.
Tools You Need for a Clean Installation
Two tools make an invisible zipper installation reliable rather than frustrating. Neither is expensive, and attempting the installation without them dramatically increases the chance of a visible seam or an uneven result.
Invisible Zipper Foot
An invisible zipper foot has two tunnels on its underside — one for each side — that hold the coil upright and away from the tape as the foot moves along it. This allows the needle to stitch as close as possible to the coil base (within approximately 1–2 mm) without catching the coil itself. Stitching further than 2 mm from the coil base is the primary cause of a visible ridge or gap in the finished seam, because the coil cannot roll back fully to hide behind the tape.
Most invisible zipper feet sold as sewing machine accessories fit multiple brands but confirm compatibility with your machine's shank type (low shank, high shank, or slant shank) before purchasing.
Iron for Pre-Pressing the Coil
Before sewing, the coil must be unrolled from its curled position using a warm iron. Roll the iron tip along the coil on the right side of the zipper tape, gently pressing the coil flat and outward. This step is not optional — an unpressed invisible zipper coil resists lying flat under the zipper foot and makes it nearly impossible to stitch close enough to the coil base for a truly invisible result.
How to Sew an Invisible Zipper: Step-by-Step
The following steps apply to a standard dress back or side seam installation on a medium-weight fabric with a 1.5 cm seam allowance. The seam should be stay-stitched and finished before beginning, but left unsewn along the zipper opening.
- Mark the seam allowance line on both fabric pieces at the zipper opening — 1.5 cm from the raw edge. This is where the zipper tape edge will align.
- Press the coil open. With the zipper right side up, run the iron tip along the coil to uncurl it away from the tape. Work from the top stop downward.
- Pin or clip the right zipper tape to the right fabric piece, right sides together. Align the tape edge with the seam allowance line and the top of the coil approximately 2 mm below the finished seam line at the top. The zipper pull should face down at this stage.
- Attach the invisible zipper foot and place the right-side coil in the right tunnel of the foot. Stitch from the top stop downward, stopping when the foot reaches the pull or when you feel resistance. Backstitch to secure. Do not sew past the pull.
- Pin the left zipper tape to the left fabric piece in the same alignment — right sides together, tape edge at the seam line. Confirm the two fabric pieces align correctly before stitching by closing the zipper briefly and checking the seam matches.
- Stitch the left side using the left tunnel of the zipper foot, again from top to bottom, stopping before the pull.
- Close the zipper and switch to a regular zipper foot. Fold the zipper tapes out of the way and stitch the remainder of the seam below the zipper, overlapping the last stitch of the zipper stitching by approximately 1 cm to close any gap.
- Press from the wrong side using a press cloth. Do not press directly on the zipper coil.
The entire installation process, once practiced, takes under 15 minutes on a standard dress seam. The most time-critical step is pressing the coil flat before stitching — skipping this consistently produces substandard results regardless of skill level.
Common Invisible Zipper Problems and How to Fix Them
Even experienced sewers encounter issues with invisible zippers. Most problems have a specific, identifiable cause and a straightforward fix — either in the current installation or to prevent in the next one.
A Ridge or Bump Is Visible on the Right Side
Cause: The stitching line is too far from the coil base — typically more than 2 mm away. The coil cannot fully roll back to hide behind the tape when the zipper is closed. Fix: Remove the zipper, re-press the coil, and restitch closer to the coil base using the invisible zipper foot's tunnel to guide the needle position.
The Seam Puckers or Pulls Around the Zipper
Cause: The zipper tape was stretched during stitching, or the zipper tape edge was not aligned consistently with the seam allowance line. On bias-cut or stretch fabrics, the fabric was stretched against the zipper tape while sewing. Fix: On stretch or bias fabrics, always staystitch the seam allowance on the zipper opening before installing the zipper, and ease rather than stretch the fabric as it feeds through the machine.
A Gap Shows at the Bottom of the Zipper Seam
Cause: The seam below the zipper was not started close enough to the last stitch of the zipper stitching. A gap of even 3–4 mm between the zipper stitching and the seam stitching creates a visible hole or weak point. Fix: When stitching the seam below the zipper, position the needle to overlap the last zipper stitch by at least 1 cm. Use a regular zipper foot (not the invisible zipper foot) for this step so you can position precisely.
The Zipper Coil Is Caught in the Stitching
Cause: The coil was not pressed fully open before sewing, causing it to fold back under the foot and be caught by the needle. This produces stitches that cross the coil and prevent the zipper from closing. Fix: Remove the stitching carefully with a seam ripper without cutting the coil, re-press the coil thoroughly, and resew. If the coil is damaged, the zipper must be replaced.
The Two Seam Edges Don't Meet When the Zipper Is Closed
Cause: The two zipper tape sides were positioned at different distances from the seam allowance line, or one side was sewn with the fabric grain slightly off. Fix: Before stitching the second side, close the zipper and lay the garment flat to verify alignment. Clip rather than pin the second side for more accurate positioning, as pins can shift the tape slightly on slippery fabrics.
Invisible Zippers on Different Fabric Types
The basic installation technique is the same across fabric types, but specific fabrics require adjustments in preparation, needle choice, and pressing to achieve a clean result.
| Fabric Type | Needle Size | Key Preparation Step | Common Problem to Avoid |
|---|---|---|---|
| Lightweight (chiffon, georgette) | 60/8 or 70/10 | Interface the seam allowance with a lightweight woven fusible | Fabric tunneling under foot; use tissue paper as a base layer |
| Medium-weight (cotton, linen, crepe) | 80/12 | Finish seam allowance before zipper installation | Pressing too firmly and imprinting seam allowance on right side |
| Stretch (jersey, ponte, spandex) | 75/11 stretch needle | Staystitch seam allowance; use clips not pins | Stretching fabric while sewing causes wavy seam |
| Silk and satin | 65/9 or 70/10 sharp/microtex | Test press on scrap; use press cloth | Iron marks and snags from excessive heat |
| Heavy (denim, wool coating) | 90/14 or 100/16 | Use size 5 invisible zipper; clip bulk from seam allowance corners | Bulk preventing coil from lying flat enough to press open |
Invisible Zippers in Lined Garments
Most garments that use invisible zippers — dresses, skirts, and tailored jackets — are lined. The lining must be finished around the zipper to prevent it from interfering with the zipper mechanism and to give a clean interior finish. There are two standard methods:
Hand-Slip-Stitched Lining
The lining seam at the zipper opening is turned under and slipstitched by hand directly to the zipper tape. This is the couture and tailoring standard — it produces the neatest finish with no machine stitching visible at the zipper tape. The lining should be turned under 5–6 mm from the tape edge, leaving the tape itself free to flex with the zipper movement.
Machine-Sewn Lining Method
The lining is sewn to the zipper tape using a zipper foot with the lining seam allowance folded back. This is faster than hand stitching and acceptable for ready-to-wear production, though it produces a slightly stiffer result near the zipper tape. On very lightweight linings, this method can cause the tape to show slight tension lines on the right side of the garment if the stitching line is too close to the fold.
Regardless of which method is used, always leave 1–2 cm of ease at the bottom of the lining opening so the lining does not pull against the garment fabric when moving. A lining that is too tight at the zipper shortens zipper life and creates tension wrinkles visible on the garment's exterior.
Caring for Garments with Invisible Zippers
Invisible zippers are more delicate than regular zippers because the nylon coil is exposed at the back of the tape without the protection of a shield or flap. With proper handling, a quality invisible zipper should last the lifetime of the garment — but specific care habits make a significant difference in how long it performs cleanly.
- Always close the zipper before washing or dry-cleaning. An open zipper coil can snag on other garments or drum surfaces in a washing machine. Closing it also protects the coil alignment so it continues to roll back cleanly after cleaning.
- Avoid direct iron heat on the zipper coil. Nylon coils soften and distort at temperatures above approximately 150°C. Always press the seam area from the wrong side with a press cloth, or use a seam roll to press the seam without contacting the coil directly.
- Lubricate a stiff zipper with beeswax or a dry zipper lubricant. Run a small amount along the closed coil and work the zipper up and down several times. Avoid oil-based lubricants, which attract lint and can stain the fabric tape.
- Do not force a stuck zipper. The most common cause of invisible zipper failure is forcing the pull when the coil is snagged in the fabric. Gently work the fabric free before moving the pull further. Forcing creates coil distortion that cannot be corrected and requires zipper replacement.
- Store the garment hanging, not folded at the zipper. Repeated folding at the same point along the coil can permanently crease the nylon and cause the zipper to sit at an angle when closed, creating a visible line in the seam.
When to Replace an Invisible Zipper
Replacing an invisible zipper in a finished, lined garment is a skilled alteration that takes longer than the original installation — but it is straightforward with the right approach. The signs that replacement is warranted rather than repair are:
- The coil is broken, split, or has separated from the tape in a section.
- The slider (pull mechanism) no longer engages the coil cleanly — the zipper closes but reopens under movement, indicating the slider has widened from wear.
- The coil is permanently distorted from heat damage and no longer rolls back flat when closed.
- The tape is torn or has pulled away from the seam stitching at multiple points.
A slider that has separated but the coil is intact can sometimes be replaced using a replacement slider in the correct size — a much faster repair than full zipper replacement. YKK and other major brands supply replacement sliders individually for most of their standard zipper sizes. Replacing just the slider costs under $2 in parts and takes under 10 minutes, making it worth attempting before committing to full zipper removal in a finished garment.


